💡 The idea
An automatic irrigation system is really just three things: electrovalves that open water lines, something that switches them on and off, and a schedule. The valves are a solved problem — Rain Bird has been making 24 VAC solenoid valves for decades. The “something that switches them” is where commercial controllers get you: clunky interfaces, proprietary apps, no integration with the rest of the smart home.
A Sonoff 4CH Pro R3 solves that neatly. It’s a four-channel Wi-Fi relay with dry contacts — each relay is a plain isolated switch, electrically independent from whatever powers the board. That means it can switch a completely separate low-voltage valve circuit, which is exactly what irrigation needs. Four relays, four watering zones.
🎛️ Why this beats an off-the-shelf controller
A conventional irrigation controller does one thing: run zones on a timer. This build is a set of open building blocks, and that makes it far more customizable:
Control from anywhere, your way. Out of the box the Sonoff works through the eWeLink app — schedules, timers, manual control from your phone. It also comes with 433 MHz RF support, so a cheap remote can trigger zones from the garden without touching a phone, and the physical buttons on the unit itself still work when the Wi-Fi doesn’t.
Plugs into Home Assistant. Each zone becomes a switch entity (the eWeLink integration works out of the box; the board is also flashable with ESPHome or Tasmota for fully local control). From there, irrigation stops being a timer and becomes automations: water at dawn when evaporation is lowest, skip the run when the forecast says rain, water longer during a heat wave based on an outdoor temperature sensor, and get a notification if a zone ran longer than expected.
Grows with you. Need a fifth zone? Add another Sonoff. Want a soil moisture sensor to decide whether to water at all? It’s one more entity in the same automation. No conventional controller lets you rewrite its logic — this one is only logic.
🛒 Shopping list
Everything used in this build:
4-channel Wi-Fi + RF relay with dry contacts — the brain of the system.
View on Amazon →Steps 230 V mains down to the 24 VAC the valve solenoids expect.
View on Amazon →Houses the Sonoff and transformer outdoors, rain or shine.
View on Amazon →One per zone — the industry workhorse for opening and closing water lines.
View at Leroy Merlin →⚡ The electrical logic
Rain Bird solenoids are 24 VAC, so the transformer steps 230 V mains down to the 24 VAC the valves expect — the standard arrangement for irrigation. The Sonoff never powers the valves itself; its dry-contact relays just sit in the middle of the 24 VAC circuit like light switches. One nice property of AC: there’s no polarity to get wrong on the valve wiring — the two solenoid wires are interchangeable.
🔌 The wiring
Here’s the schema, exactly as installed:
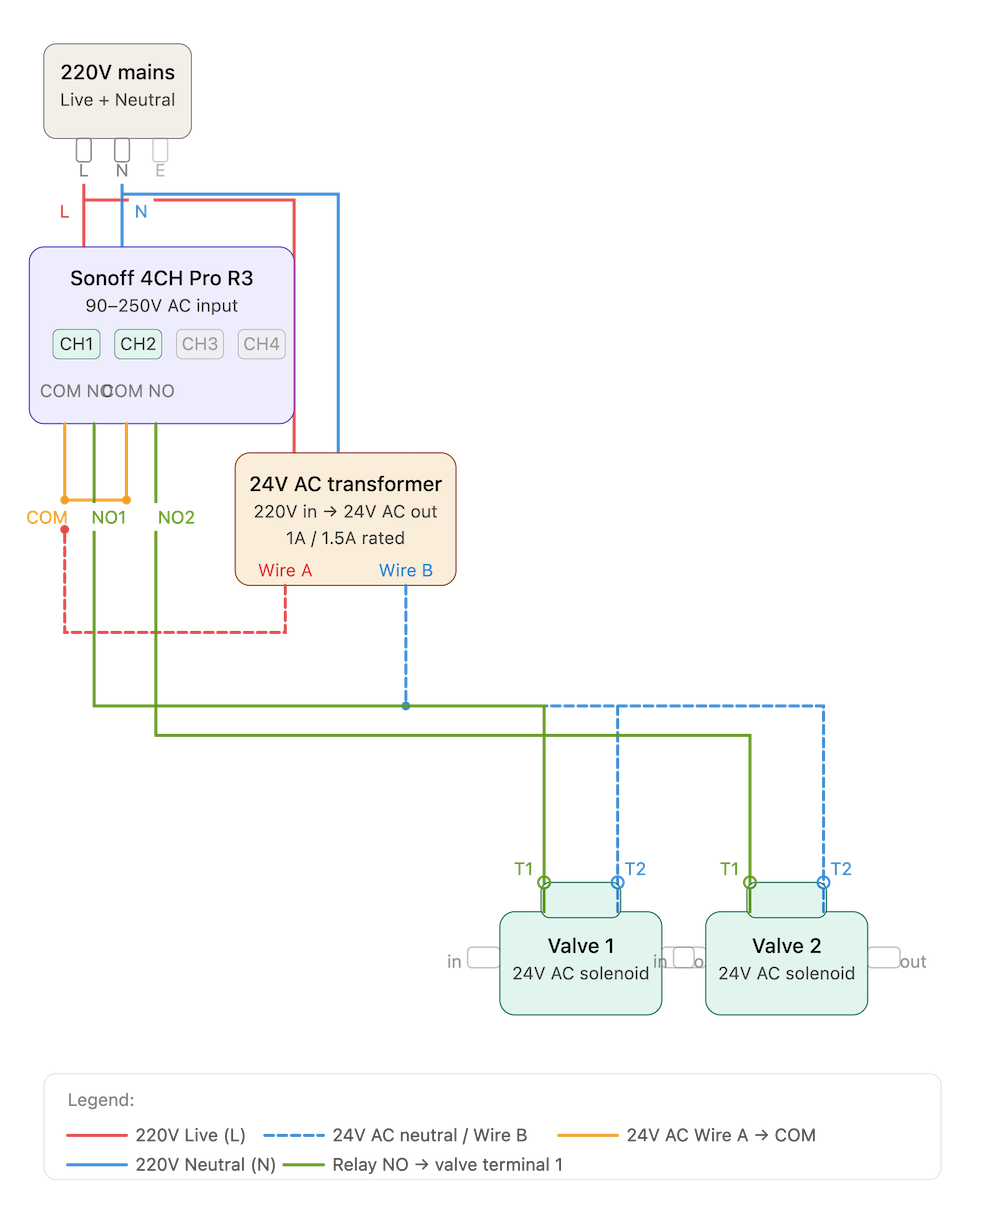
230 V mains ──┬── Sonoff 4CH Pro R3  [Input 100–240V: N, L]
              │
              └── 24 VAC transformer  [Primary: N, L]
                        │
                  Secondary A ──── COM R1 ── COM R2 ── COM R3 ── COM R4
                                    (daisy-chained commons)

   R1 NO ── zone 1 solenoid wire ─┐
   R2 NO ── zone 2 solenoid wire ─┤
   R3 NO ── zone 3 solenoid wire ─┼── all solenoid return wires ── Secondary B
   R4 NO ── zone 4 solenoid wire ─┘
Step by step:
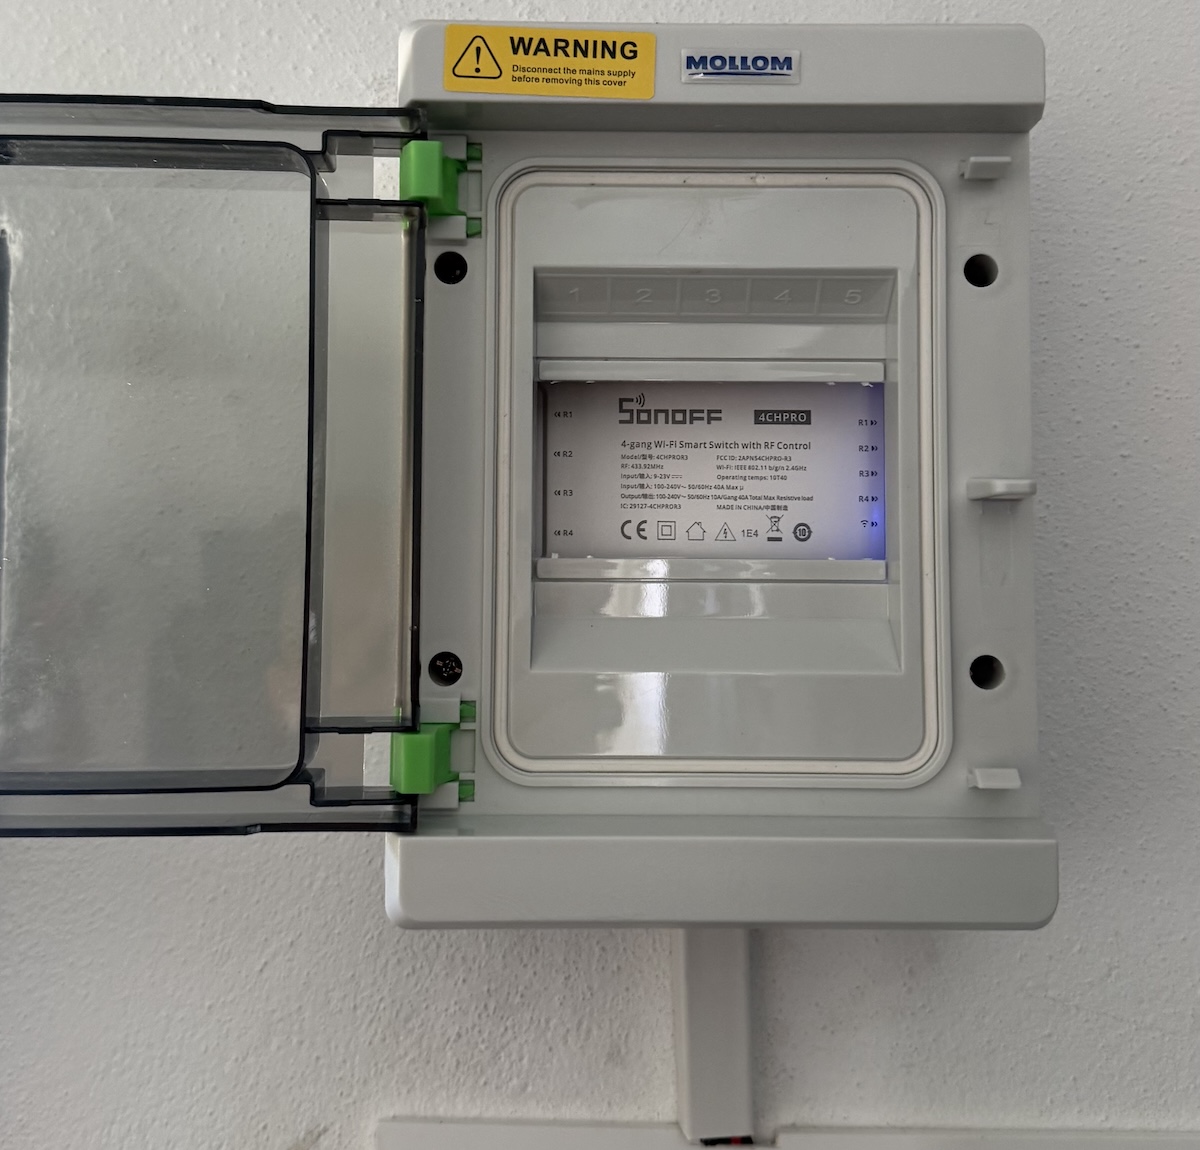
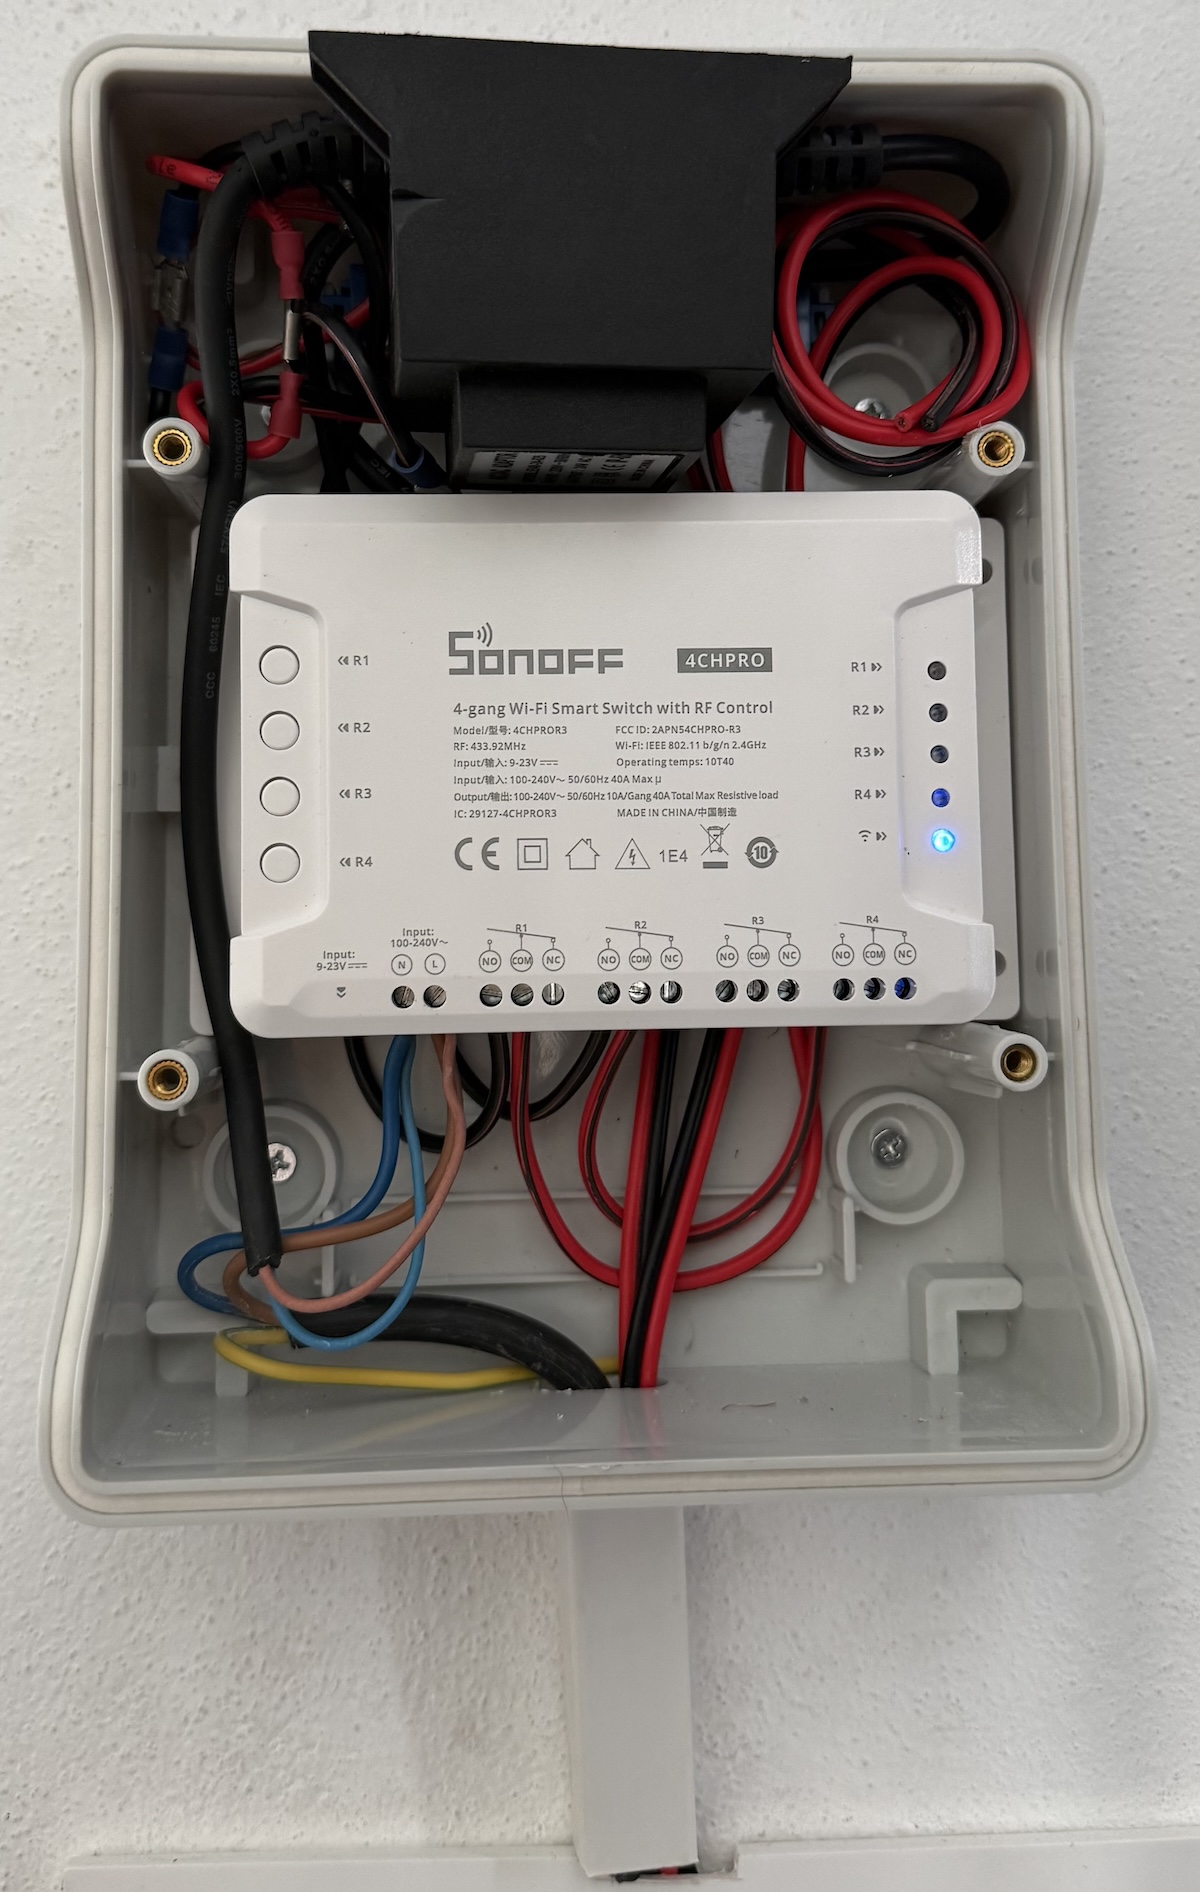
- Mains in. Bring 230 V into the waterproof enclosure and split it two ways: to the Sonoff’s
Input 100–240VN/L terminals (the board powers itself from mains directly) and to the transformer’s primary. - One secondary leg to the relays. Take one wire of the transformer’s 24 VAC secondary to the
COMterminal of relay 1, then daisy-chain it acrossCOMof relays 2, 3 and 4 with short jumpers. - One wire per zone. From each relay’s
NO(normally open) terminal, run one conductor out to the valve box — one per zone. - Common return. In the valve box, join the second wire of every solenoid together and run a single return conductor back to the transformer’s other secondary leg.
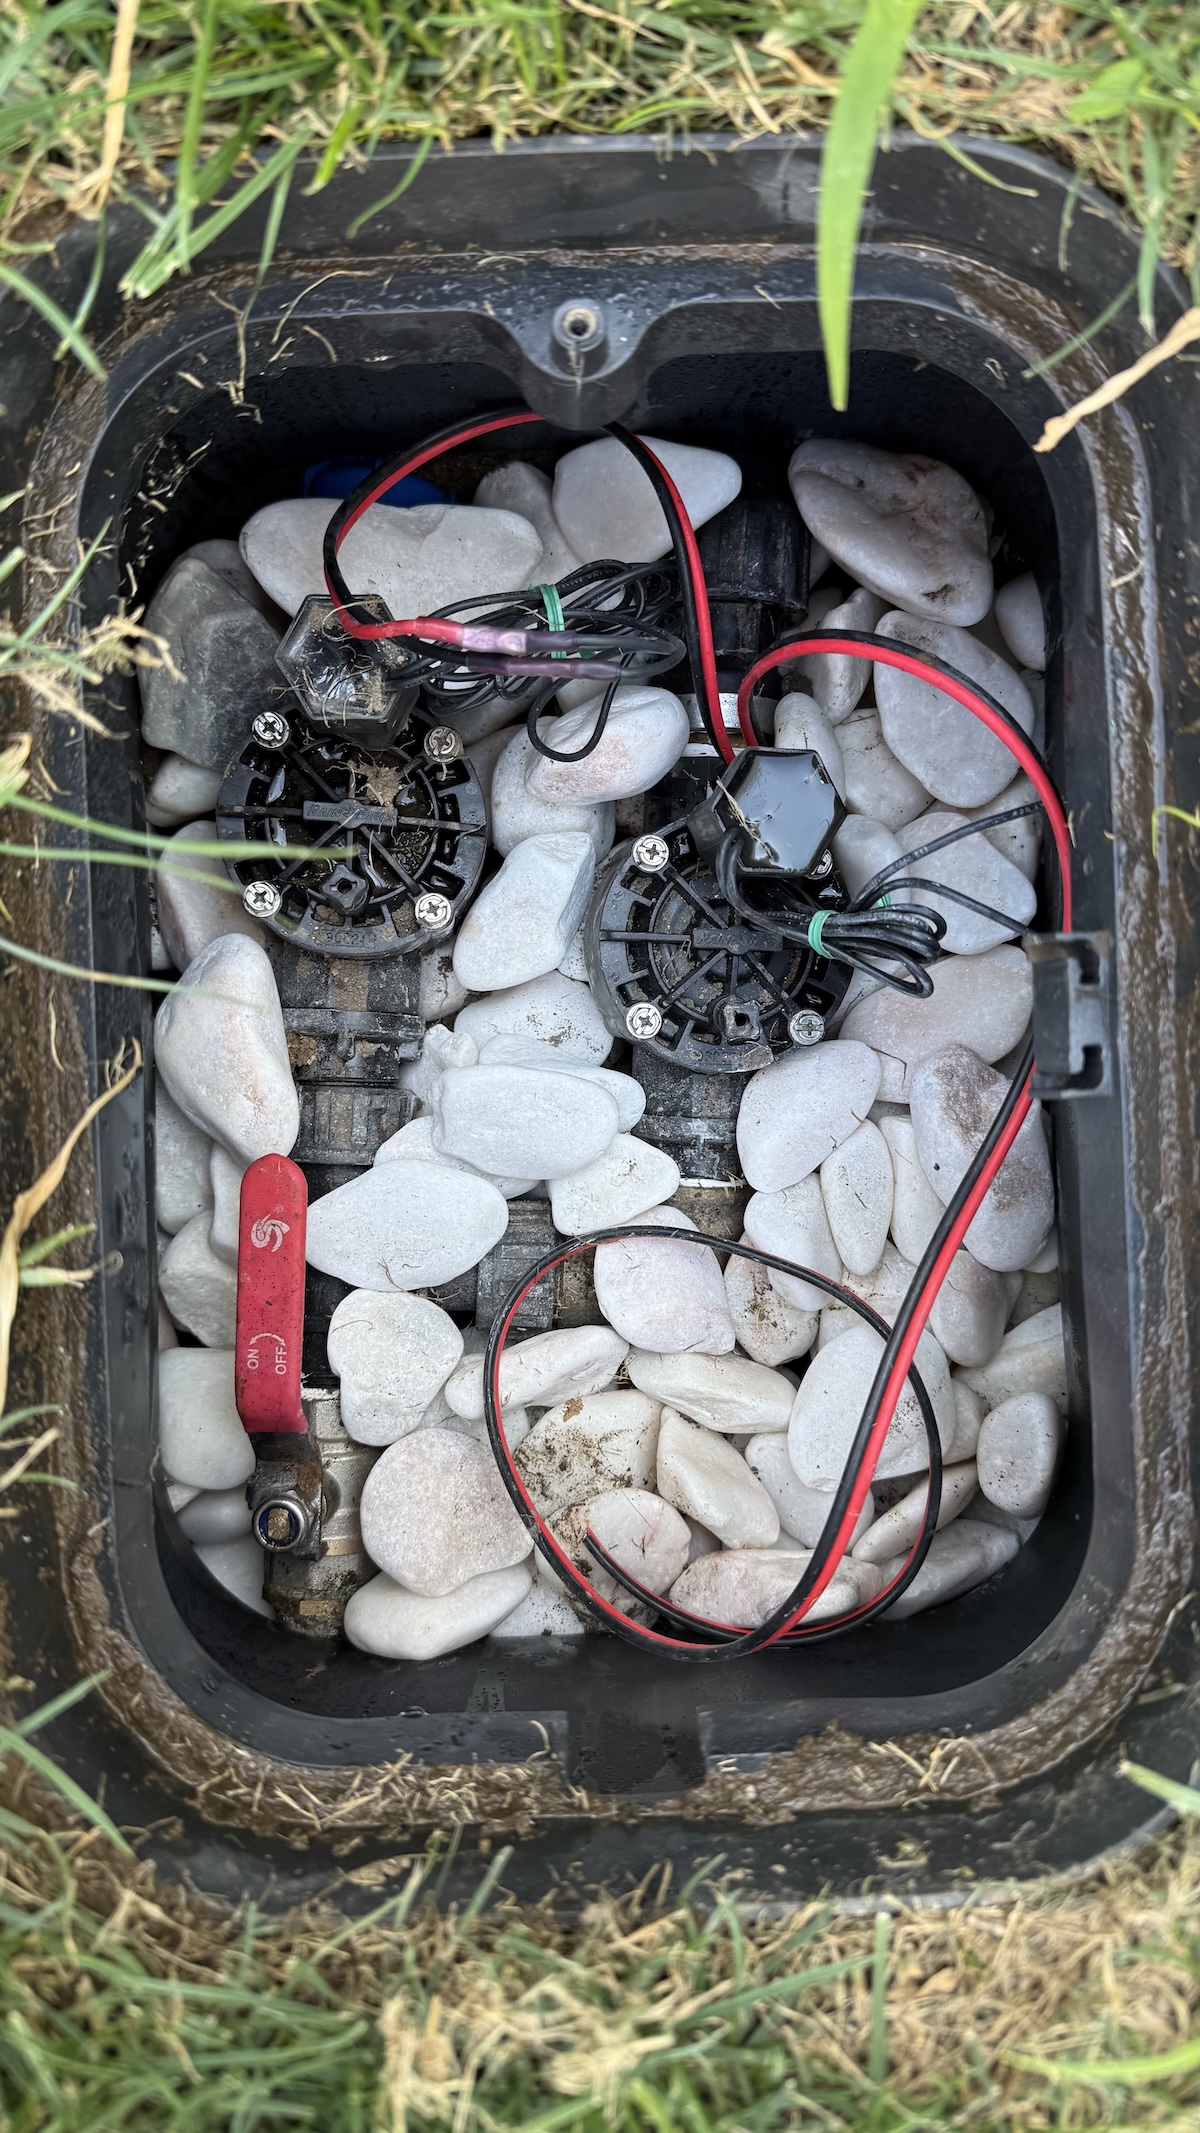
- Plumbing side. The valves sit in an underground valve box: manual ball valve first (so you can cut water for maintenance), then the Rain Bird valves inline. Use gel-filled waterproof connectors on every splice — this box floods, that’s its job. A bed of gravel or pebbles at the bottom keeps fittings out of the mud and lets it drain.
📱 Configuration
Pair the Sonoff with the eWeLink app first, then two settings matter:
Interlock mode. Enable it so only one relay can be on at a time — one zone watering at any moment, full pressure, no overloaded transformer.
Home Assistant. Bring the board into Home Assistant and build your schedules there instead of in the app. Ours waters at dawn, skips rainy days automatically, and reports every run in the nightly digest — try asking a store-bought controller to do that.
🌱 What we’d tell you before you start
The whole system came in well under 100 € and has run all summer without a hiccup. If we were doing it again: buy the waterproof connectors before you think you need them, label both ends of every zone wire the moment you pull it, and put the enclosure somewhere you can actually reach — future-you will be standing there with a multimeter eventually.
Want a smart irrigation setup — or a whole smart home — without doing the trenching yourself? We do installs, schema and all.